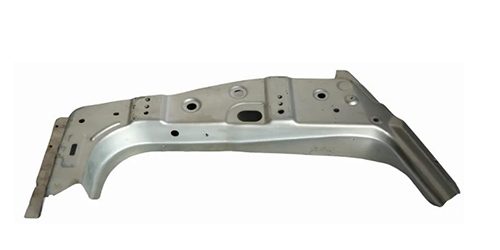
In the processing of precision hardware parts of aluminum profile drawing and bending encountered in the surface defects and other problems of the solution, Huiyuan precision hardware to share with you including the adjustment of the curvature of the molding profile, surface defect treatment, stretching and bending after the distortion treatment, perpendicularity over the treatment of differences, contour processing length determination, safety production and other aspects of the solution.
Adjust the curvature of the molding profile
- according to the theoretical analysis to calculate the amount of springback, through the tensile test obtained the correction approximate correction mold, so that the stretched profile and profile sample or check the mold tire match, considering the instability of the profile, according to the need for late correction, can be pulled over a little.
- bending radius curvature change too large cause slight deviation, and the cylinder can increase the direction of the vertical mold in front of the mold, the need to bend the profile and the mold coincide, and the drawing and bending mold and the drawing profile should not have a gap, this method can solve the drawing center of curvature of the heterogeneous side of the bending problem.
- in the design process, should consider the form of the profile cross-sectional area and the thickness of each part. For the asymmetry of the cross-sectional area of the profile, the deviation caused by the stress imbalance between the closed side and the loosened side of the profile can be appropriately increased during the prestretching of tension.
Surface defect treatment
- if the edge of the profile is not in place, it will cause shrinkage and wrinkling, commonly known as a mullet edge. If the tension after drawing and bending is large, the edge stress is unbalanced, resulting in the profile cracks. This can be solved by improving the cross-sectional area of the outline or adjusting the tension.
- The depression of the bending surface mainly occurs in the profile of the cavity. This type of profile requires padding to fill the curved portion of the cavity before drawing and bending. Open cavities can be filled with spring plates or Teflon fillers, while closed cavities are usually filled with sand, etc.
- according to the side droop traces of the part, adjust the mold clearance, the improvement of the mold material can effectively prevent the profile from being scratched.
Twisting treatment after stretching and bending
- After drawing and bending, the main cause of distortion is the asymmetry of the cross-sectional area and the stress imbalance between the closure and release edge of the profile. In view of this, industrial aluminum profiles can be improved by increasing the tension of profiles, that is, adding a vertical push cylinder and bending die in front of the drawing;
- at the same time, after pulling and bending, it is best to maintain the pressure for a period of time. In addition, trace deformation caused by unstable extruded profiles must be completed by late correction.
Verticality exceeds treatment differences
- After drawing and bending, the verticality exceeding the difference is also caused by the asymmetric cross-sectional area and the uneven street closure and release stress of the profile. This situation can be improved by adjusting the curvature of the drawing and bending tools.
- According to the needs of late correction, it can be slightly pulled over. The trace deformation caused by the instability of extruded profiles needs to be completed by post correction.
Determination of contour processing length
The rough length of the tensile bending profile is composed of the length of the part, the curvature extension of the die (the length of the part, the extension part and the fillet of the die end are collectively referred to as the effective length of the die), the clamping part of the equipment chuck and the rotation clearance of the equipment chuck extension die. In addition to the part length, it is collectively known as the process length, mass production process length directly determines the cost of parts.
Therefore, it is recommended to meet the bending parts forming state, in order to reduce the effective length of the mold; If necessary, a notch can be opened at the rear of the end of the die to allow free access to the back of the die for the working machine chuck, thereby reducing the process allowance at both ends of the wool.
Safe production
Safety is a primary concern in industrial processes. Therefore, during the production process, additional protective devices should be added in front of the profile operating table, corresponding regulations should be formulated, and comprehensive technical operators should be trained. In addition, it is strictly prohibited for the operator to stand at the front of the equipment during the contour stretching process.
Conclusion
In summary, when designing the cross-sectional area of the section, the tensile force of each section part should be calculated to draw and bend the profile. In the design of drawing and bending tooling, the curvature rebound and pre-deformation of industrial aluminum profiles should be considered in the later correction so as to reduce the workload in the correction process as much as possible.
Safety production is the primary concern for reducing production costs in mass production, in order to reduce the workload of the calibration process and reduce the process length of wire drawing and bending materials.
When the stretched profile is unstable, there will be a small amount of curved profile corridor deviation; Distortion over poor, verticality over poor, other defects can be corrected later.


